
This tutorial for beginners explains what Bitcoin Core is, why you should use it and how to install it.
Bitcoin Core
In the Bitcoin world, applications that allow you to send, receive and securely store bitcoins are called wallets.
Bitcoin Core is such a wallet. It is being developed by the Bitcoin Core team, a group of volunteers that steers the evolution of the Bitcoin protocol.
The Bitcoin Core wallet is a good way to get your feet wet with Bitcoin and we will use for our tutorials.
Requirements
The Bitcoin Core wallet is a full node client, which means it stores the whole history of transactions that ever occurred on the Bitcoin network (the so-called blockchain). Because, of this, it needs plenty of disk space.
At the time of this writing (December 2016), you need about 100GB of disk space to store the transaction log history.
The Bitcoin Core client also needs about 2GB of RAM to run.
Finally, you need to have an Internet connection with sufficient bandwidth, because the first synchronization with the Bitcoin network will consume 100 gigabytes plus additional gigabytes on a monthly basis.
I have a 3 year old PC connected via ADSL to the Internet, and the Bitcoin Core client runs flawlessly on it. So if your computer is fairly recent it should run Bitcoin Core without a problem.
Installing Bitcoin Core
The first step is to download the installation package from the BitCoin Core download page. I have a PC running Windows 8, so I will use that package to further illustrate the article. However, there are also packages available for Mac OS X and Linux.
So download the Windows client:

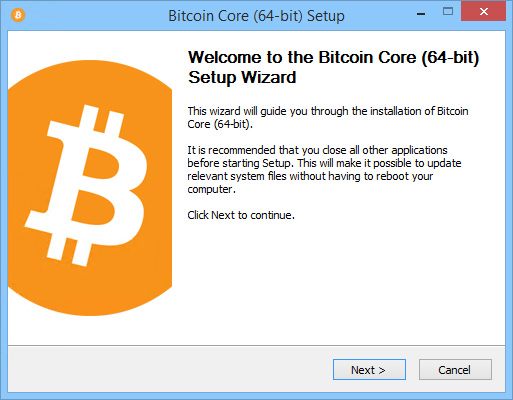
Once you have downloaded the package, double-click it to start the installation:

The installation wizard will start. Click on the “Next >” button:
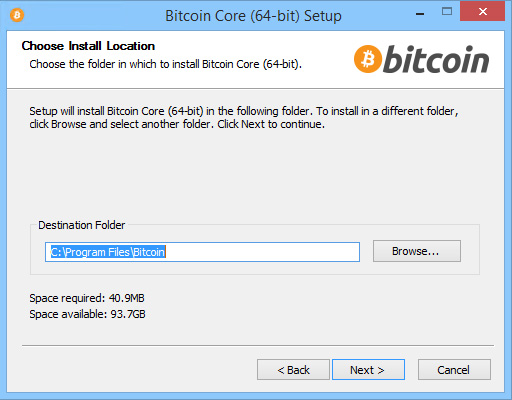
In the next screen, the installation program will ask for the destination folder of the software. Please note that this is the folder where the program files will be stored. If you have more than 100 GB available on that drive (say 150-200 GB), you can accept the defaults.
After installation, at the first start of the software, you will be able to chose if you want to store the Bitcoin transaction history in the same location, or chose another location. So even if you don’t have 100 GB available on the default installation drive, you can proceed for now and change the destination folder for the transaction files at the first startup.
For now, I accept the defaults. So I click “Next >”:
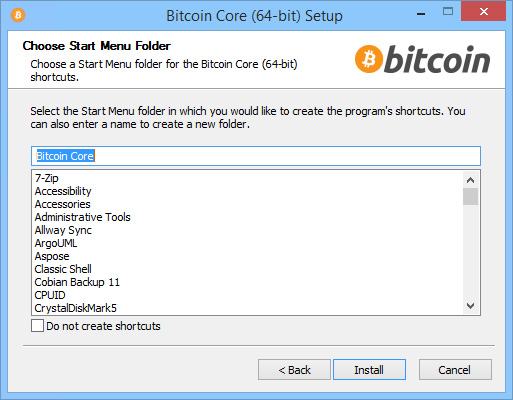
The installation software will finally ask for where to place its icons in the start menu. I just keep the defaults. Click on “Install”:
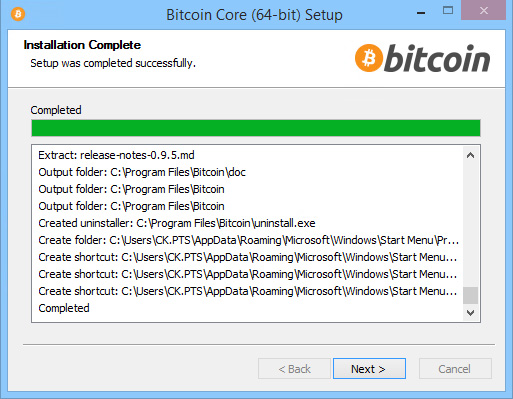
The installation will proceed until all files are installed. Then click the “Next >” button:
On the last screen of the setup wizard, keep the “Run Bitcoin Core” checkbox checked and click “Finish”:

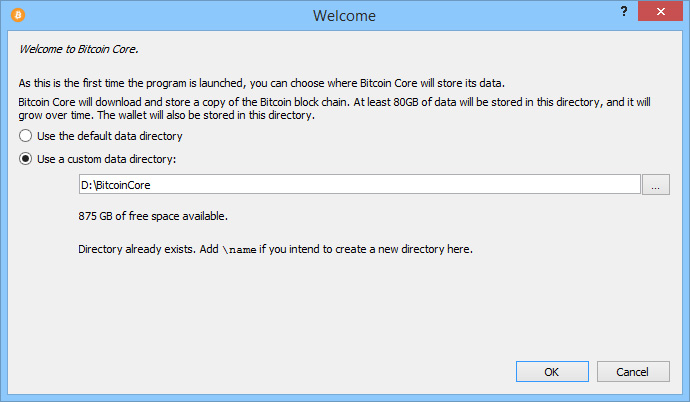
The software will now start and let you choose where to put the transaction files.
Because I don’t have enough space available on my C: drive but I do have plenty of space on the D: drive, I change the location for the Bitcoin transaction files (the blockchain) to a new folder on the D: drive. Then I click “OK”:
After a few moments the startup screen will disappear and show the main Bitcoin Core window:
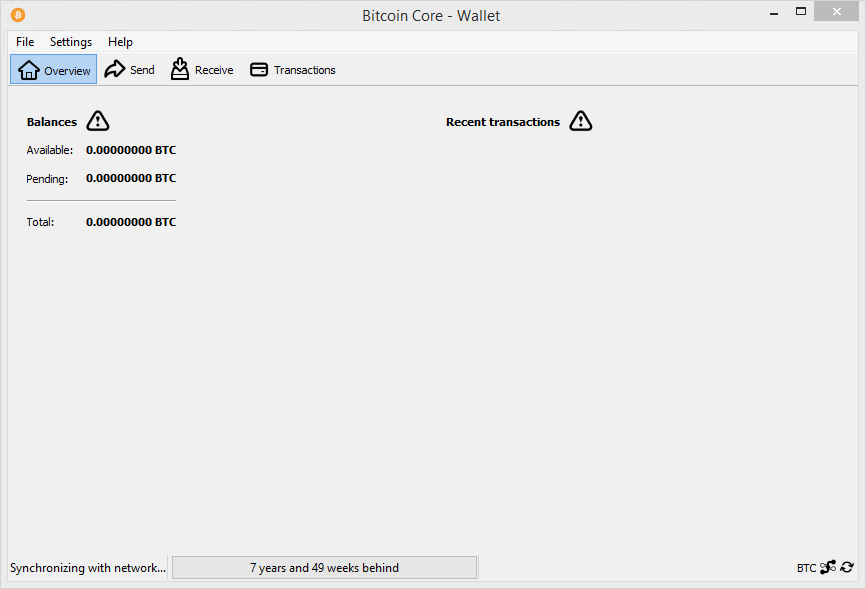
At the bottom of the client window, you will see that it is now synchronizing with the Bitcoin network and downloading the whole transaction history (about 8 years worth of transaction history as of December 2016).
This can take from a few hours to a few days, depending on the speed of your Internet connection. Because the synchronization process consumes a lot of bandwidth, it is best to let it run when you don’t need you Internet connection, for example at night or when you are away.
Also note that you can shutdown the client while it is synchronizing and restart it later on. The synchronization will resume where it left off and only download the missing transactions. So you can download the transaction history over a few evenings for example.
Once the transaction history has been downloaded, the window will look like this:
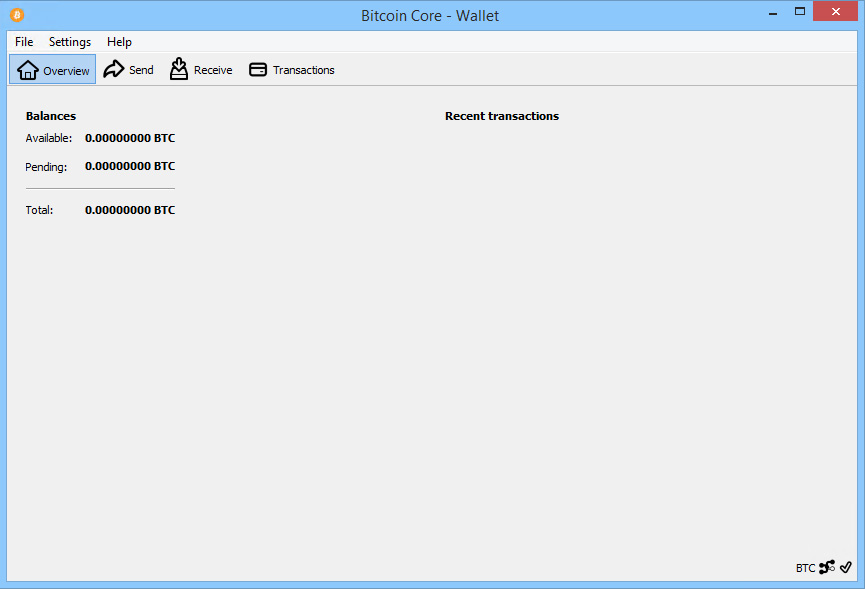
You are now ready to receive your first bitcoins, which we will cover in a subsequent article.